Direct Linking setup for KMP and Xcode
· 3 min read
When integrating Kotlin Multiplatform code into an Xcode project, you are always linking an Xcode Framework, built by the Kotlin compiler, into your Xcode project. This is true regardless of how you got that framework, and how you plan to link it with Xcode.
When building KMP locally, you need to run the Kotlin compiler with the proper settings, and then link the output. A well-configured build should handle this automatically for you. Both CocoaPods and direct linking can do this, but direct linking is the simpler and leaner approach.
Setup
The whole setup process is really just one step. Conceptually, it’s simple. However, as is often the case with KMP, the dev setting up the KMP build has little experience configuring Xcode.
We’ll be using our template app KaMP Kit to demonstrate the configuration. Clone the repo locally if you’d like to follow along.

Find your Xcode project settings
Open your iOS project in Xcode. For KaMPKit, the ios project is at ios/KaMPKitiOS.xcodeproj. You can open that visually with Xcode, or run the following on the terminal from the root of the local KaMPKit clone:
open ios/KaMPKitiOS.xcodeproj
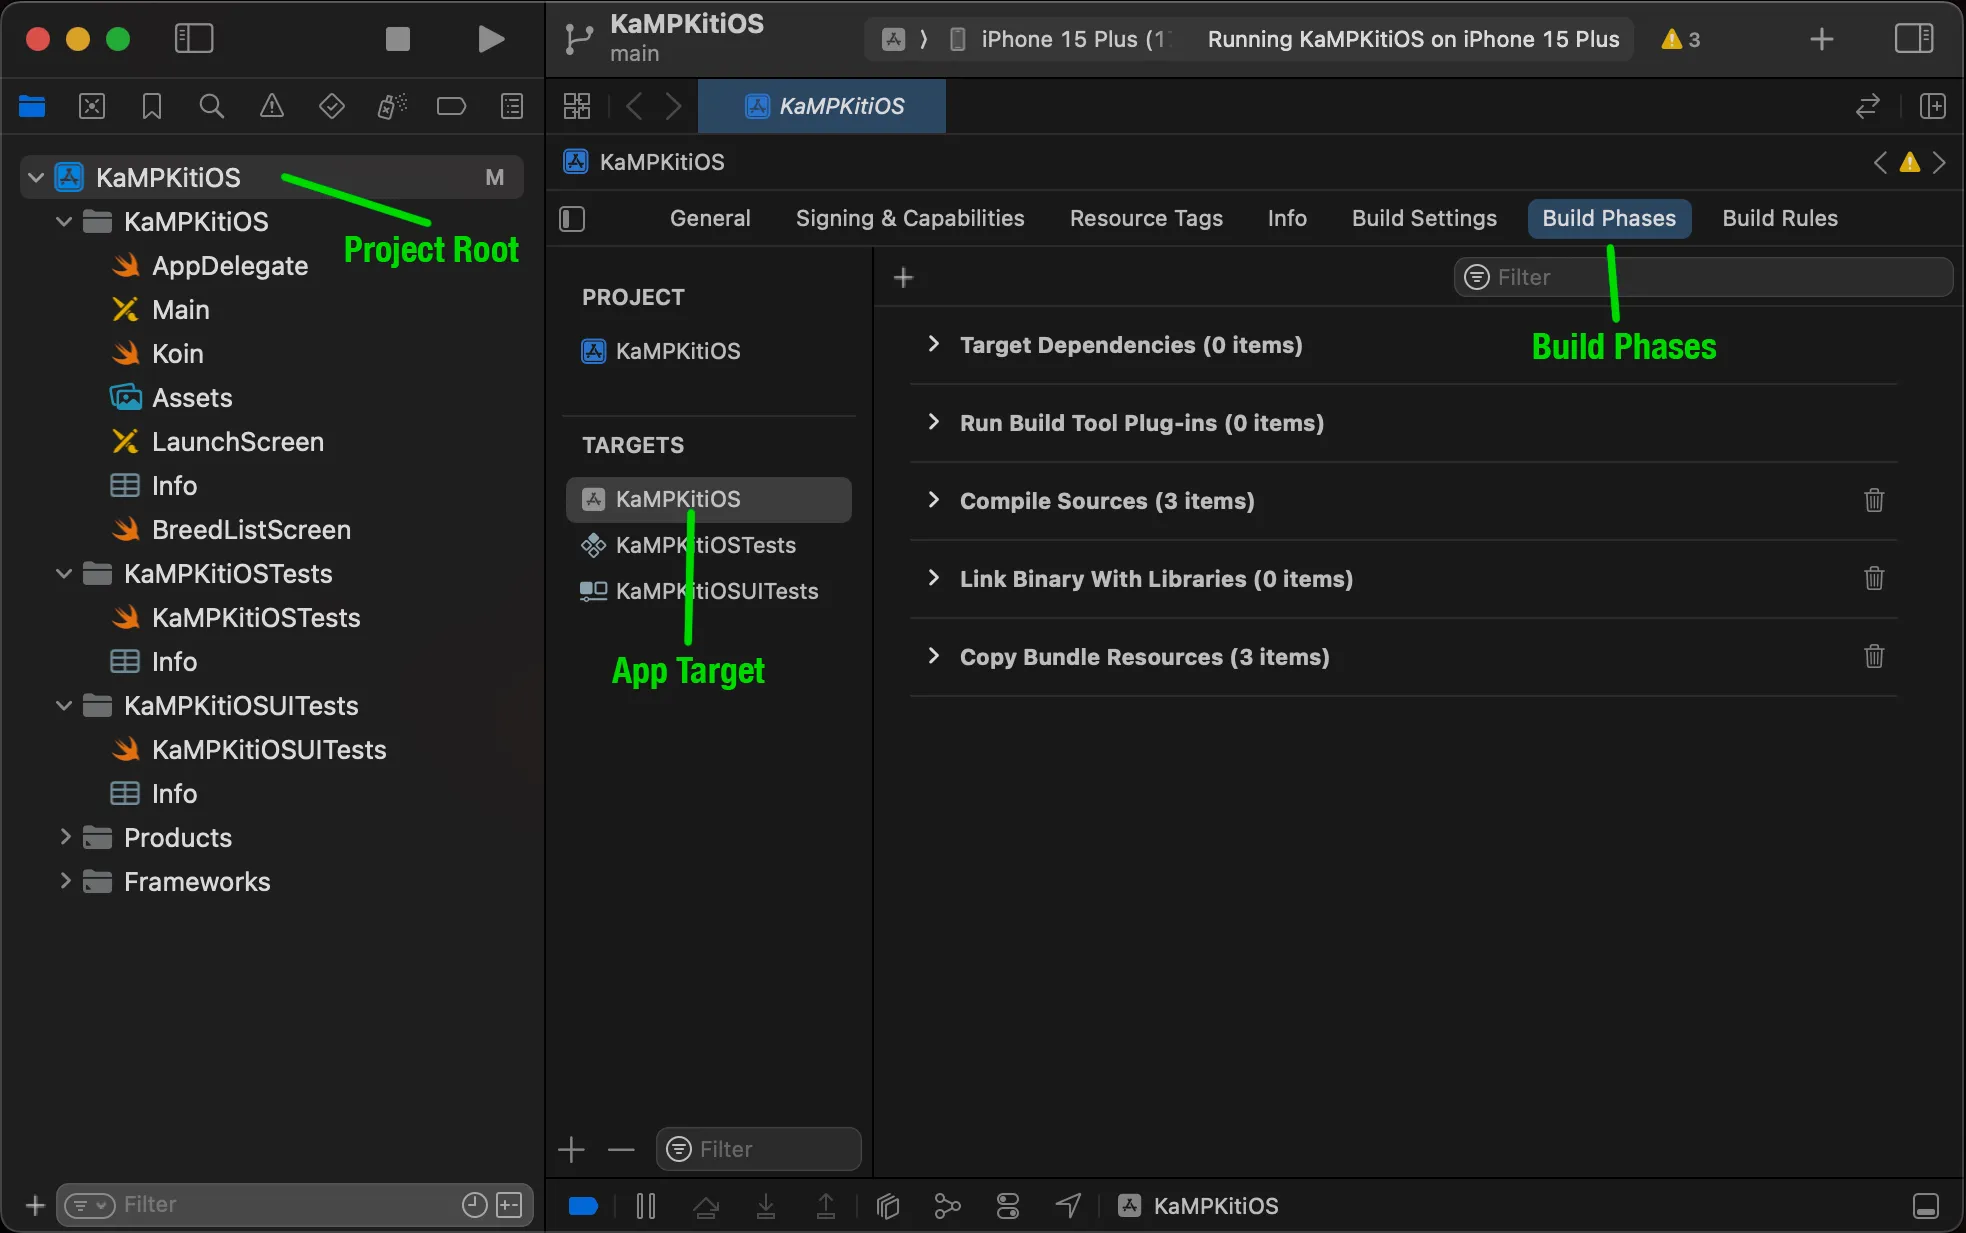
With your Xcode project open, select the parent project root in the tree navigator. Then, make sure you have the app target selected. Finally, open the “Build Phases” tab.
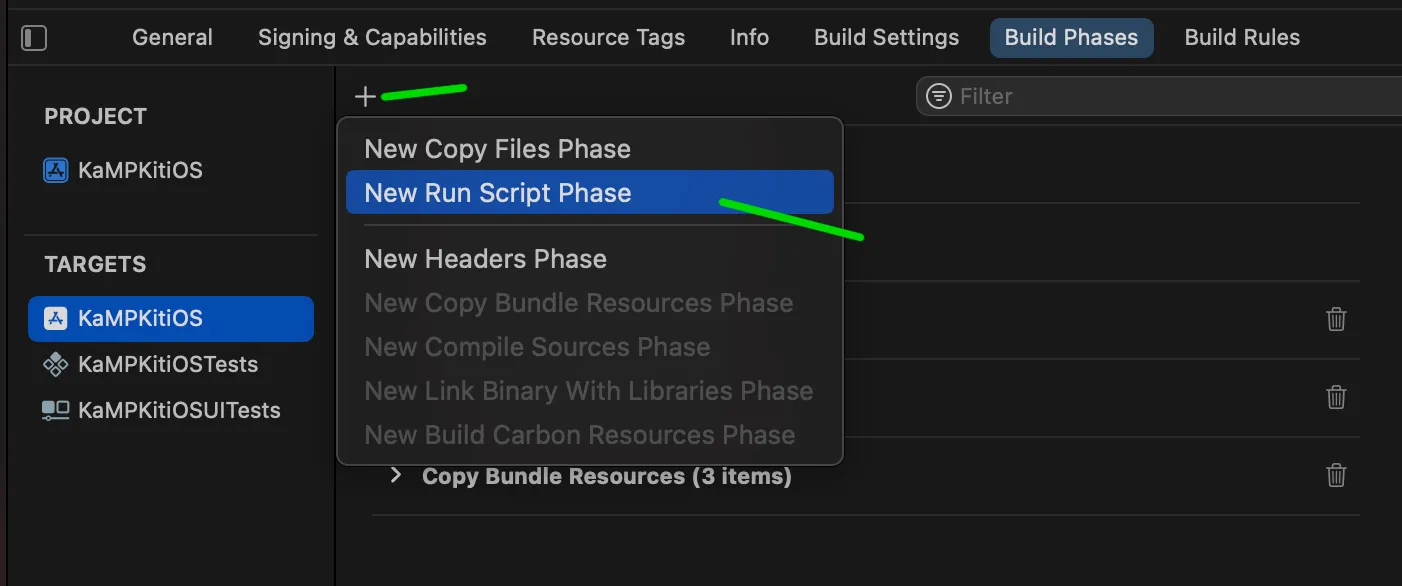
Add a Run Script
The Run Script phase already exists in the KaMPKit project. You can delete it and recreate it if you want to follow the steps below.
In the “Build Phases” tab, we’re going to add a run script that builds our Kotlin framework.
Make sure to move the new Run Script as high as you can, so it runs before Xcode tries to compile the project’s Swift code.
In the script box, add the following:
cd "$SRCROOT/.."
./gradlew embedAndSignAppleFrameworkForXcode
You need to cd to the directory that has your Gradle project. In our case, it is the repo root, which is the parent of our Xcode project $SRCROOT. Then run the Gradle task that builds everything for us: embedAndSignAppleFrameworkForXcode.
If you have multiple modules that generate Xcode frameworks, you’ll probably need to add the project prefix to the task. In this case, it would be :shared:embedAndSignAppleFrameworkForXcode.
You can watch a video of the whole process below:
Adding a Run Script
That’s it!
Xcode should now build and link your KMP framework. Select a compatible simulator target, and build your app.
Kotlin 2.0 has made this process simpler. Prior to 2.0, add the framework linking argument to “Other Linker Flags”, and the output directory to “Framework Search Paths”. For KaMPKit, add -framework shared to “Other Linker Flags” and $(SRCROOT)/../shared/build/xcode-frameworks/$(CONFIGURATION)/$(SDK_NAME) to “Framework Search Paths”.