· 3 min read Posted by Kevin Galligan
Part 3: iOS Setup
GitPortal for KMP - Bidirectional

In Part 2 we created the tutorial repos, and connected CI to be able to communicate between them. In this post, we’ll configure the iOS app to use the KMP code.
Xcode setup for KMP
Most devs setting up KMP tend to be Android devs, with limited Xcode and Apple build setup experience. This sample is fairly small, and in this case, I’d argue that the iOS config is actually simpler than the Android one. However, most production Xcode configurations will be significantly more complex.
It is highly recommended that you have expert iOS help when configuring production projects.
See Touchlab’s KMP For Teams Guide to prepare the team and your workflow for production KMP adoption.
Configure KMP builds and connect the binary
The KMP compiler builds an Xcode Framework, which is then linked to your main Xcode/iOS app build. There are a few ways you can do this, but we generally recommend “direct linking”. This process has been simplified in Kotlin 2.0. There’s only one step.
- Configure Xcode to run the Gradle build to generate the KMP Framework
You don’t need SPM
If your iOS team uses Swift Package Manager (sometimes referred to as SPM or SwiftPM), you don’t need to use SPM for local KMP builds. See our blog post for more info.
Create a Run Script to build your KMP code
Open ios.xcodeproj in Xcode. Open the project settings, find “Build Phases”, and add a new Run Script.
See screenshot
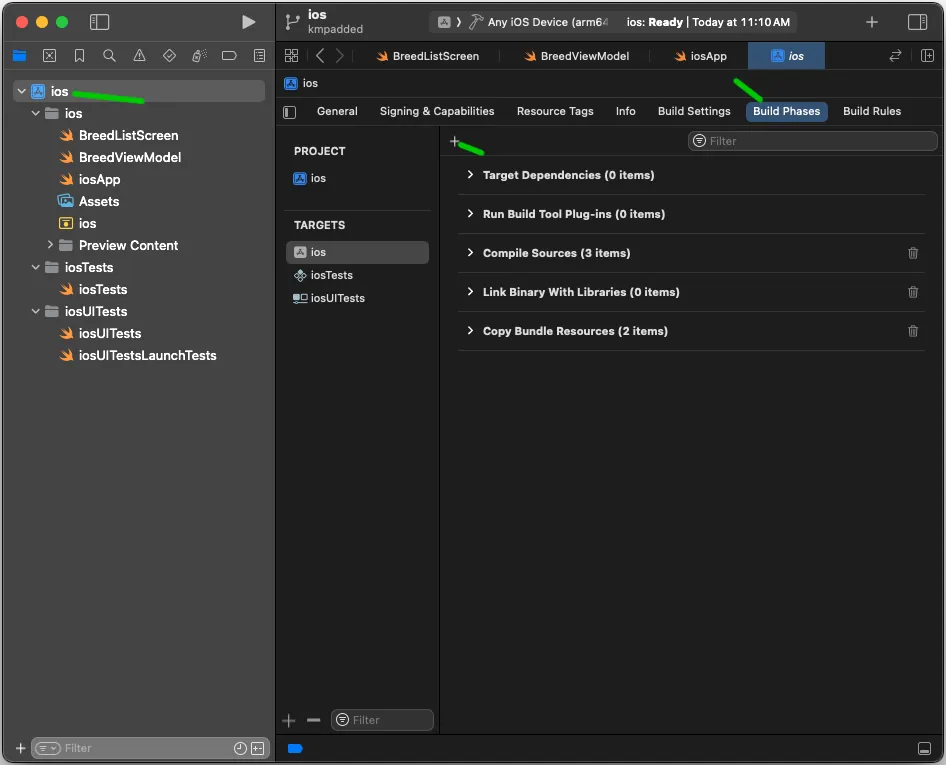
Move the new Run Script to the top of the editable list.
Watch video for creating a Run Script
Add the Gradle command
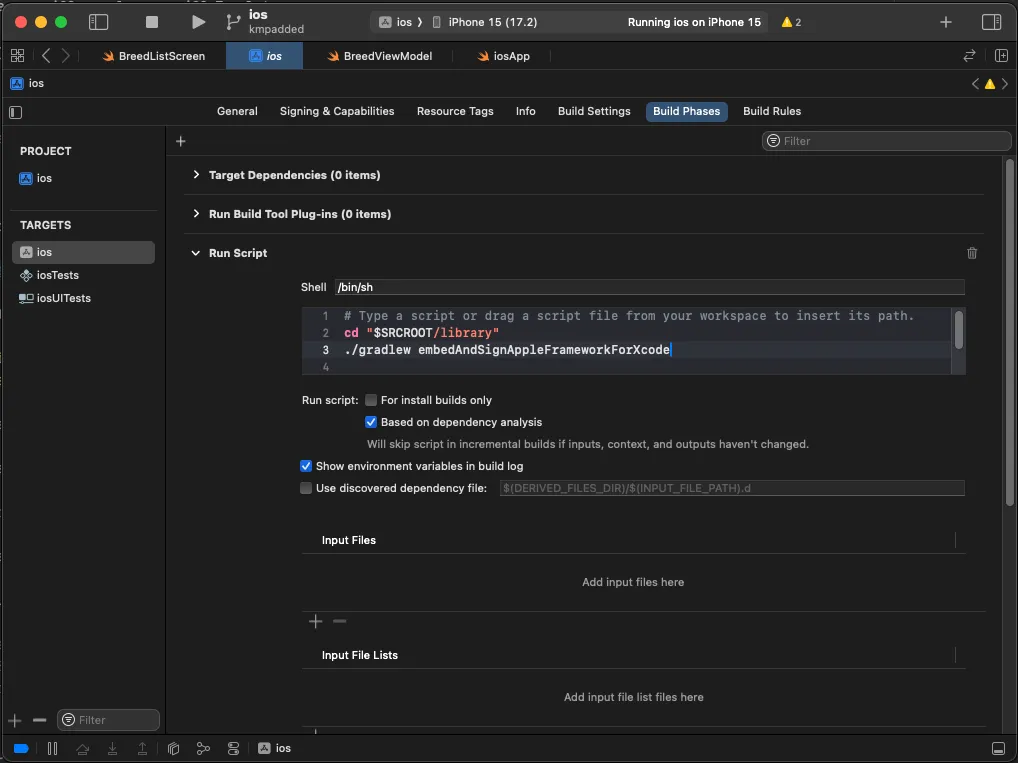
In the Run Script window, cd to the KMP directory. On the next line, call the gradle task embedAndSignAppleFrameworkForXcode.
For our project, you can copy/paste the following into the Run Script window:
cd "$SRCROOT/library"
./gradlew embedAndSignAppleFrameworkForXcode
Screenshot of Run Script setup
For Kotlin versions before 2.0, you would also need to configure linker flags and search paths. In Kotlin 2.0, we’re done!
Build the app!
Select an appropriate test simulator, and hit the “Run” button. The first build will take some time, as Gradle is running “cold”. Subsequent builds should skip over this step, unless you change the KMP code.
That’s it! You should be able to build your combined app now.
Watch the video below to see the whole process (Just FYI: the video still shows the linker settings steps required for Kotlin 1.9.x versions. For Kotlin 2.0, you can skip those).