KMMBridge SPM Quick Start
Most of the teams we talk to are using GitHub and want to use SPM for their XCFramework file access. Configuring KMMBridge from scratch is complex. That is because configuring XCFramework publications is complex. There are many points of access and resource configuration necessary.
If you are using GitHub, however, we have built a template project to make this process simple.
Repo and Dev Workflow Models
This quick start adds KMP code by introducing a KMP repo. A third repo for KMP can be much easier to introduce for an existing mobile project, and can be the preferred approach for other reasons. However, depending on your team’s goals, creating KMP modules within an Android project and publishing iOS builds from there may be a better option. See Android-host KMP workflow.
Create a KMP Repo
Open up our GitHub template repo
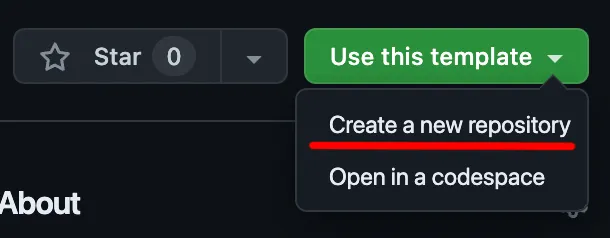
From the GitHub page, click “Use this template”, and create a repo in your org.
“Use this template” screenshot
This repo can be public or private. Private repos will allow you to control access through GitHub.
Change the GROUP value
Open gradle.properties and change the value of GROUP to something that doesn’t start with co.touchlab.
GROUP=com.yourorg.yourrepo
Why GROUP needs to be changed
This only matters for GitHub Packages, which has historically had issues with conflicting maven “coordinates”, even though they are in separate GitHub Package repos. It’s not super important to have your domain, but our workflow checks and fails the build if it starts with co.touchlab.
Set your build version
Your builds publish with a version. That is controlled by LIBRARY_VERSION in gradle.properties. Whenever you publish, be sure to update that value first.
The value currently in the template should work, but I’d suggest changing it to:
LIBRARY_VERSION=0.1.0
Make sure to commit and push that change.
Publish your first build!
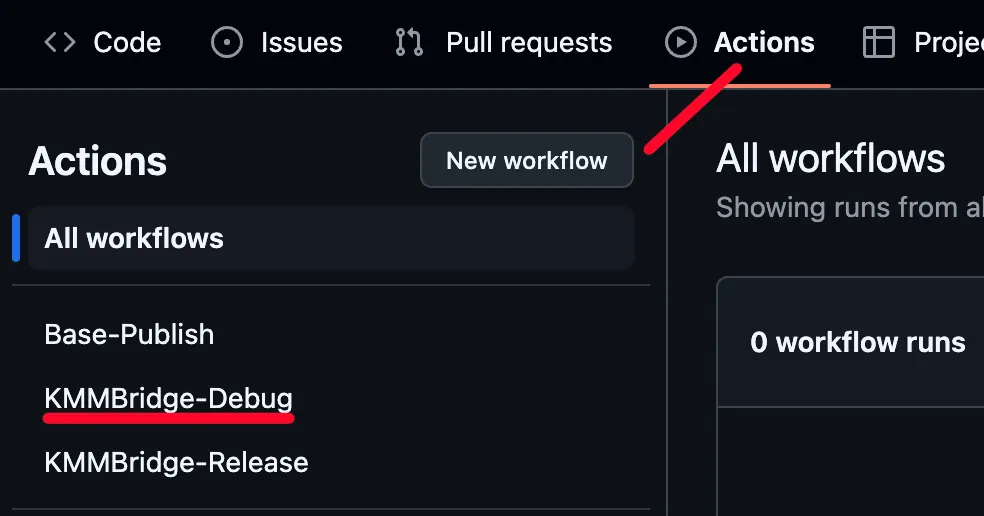
Open your new repo, then open the “Actions” tab. Find “KMMBridge-Debug” in the list of Workflows.
“Actions” tab screenshot
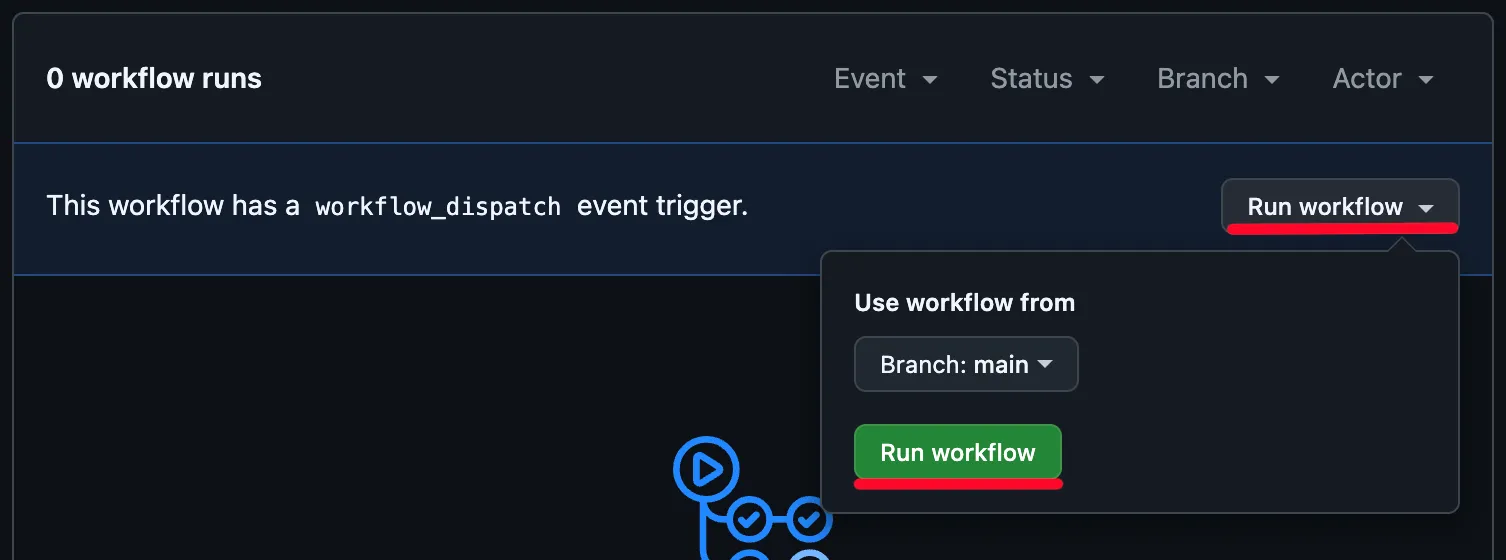
Look for “Run workflow”. Leave the branch default (main), and click the green “Run workflow” button.
“Run workflow” screenshot
⏳ Wait (~15 minutes)…
The workflow will build 3 release binaries for iOS. This can take a fair bit of time. Usually around 15 minutes.
GitHub Access
For private repos, you’ll need to authenticate with GitHub. Xcode requires this in two places:
- GitHub repo access for Xcode and SPM
- Separate binary access for SPM (running curl for downloading)
You should be able to skip this section if you have a public repo. In earlier versions of KMMBridge we used GitHub Packages. Even for public repos, GitHub requires separate authentication to access binaries stored in GitHub Packages. Recent tests with GitHub release binaries seem to work without authentication.
There’s an outstanding concern that some kind of authentication has been cached on the local dev machines of the internal developers who have tested public binary access. This should work fine, but if you run into issues, please reach out.
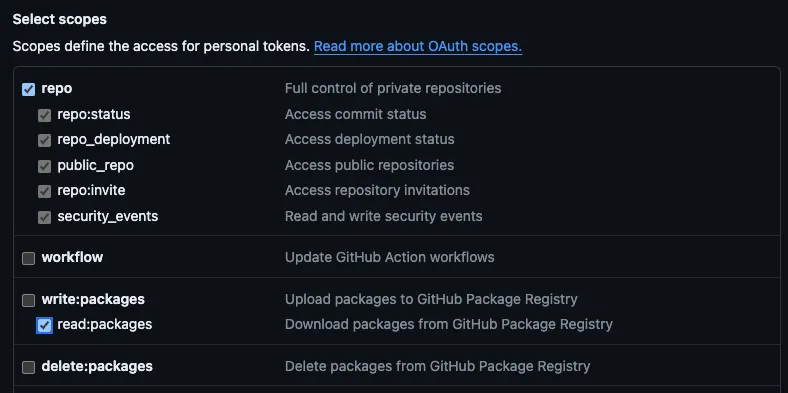
In GitHub, create a Personal Access Token. Go to your user settings, “Developer settings”, “Personal access tokens”, “Tokens (classic)”. “Generate new token” and select the “classic” option.
For all users, add the following scopes:
- repo
- read:packages
GitHub PAT scopes screenshot
Xcode requires these additional scopes:
- admin:public_key
- write:discussion
- user
GitHub Xcode screenshot
After the token is created, make sure to get and keep a copy of the token string. We’ll need to add it in a few places.
We use the “classic” PAT option because we know what scopes are needed, and most docs talk about those scopes. The “Fine-grained tokens” should also work, but you’ll need to read the docs and add equivalent access scopes.
Some Highlights (while we’re waiting)
While your build is running, let’s take a few minutes to highlight important parts of the source and configuration for your new repo.
If you want to skip ahead go to Check Your Build
Build Version
For versioned builds, SPM really likes valid semantic versioning. It’s possible to supply a different version and tell Xcode to only use that specific version, but Xcode won’t “like” it, for lack of a better description.
To publish a new version of your KMP library, open gradle.properties and edit LIBRARY_VERSION. You’ll usually want to add 1 to the third number. In the following case, the next version would be 0.1.1.
LIBRARY_VERSION=0.1.0
You can use a git branch for publishing instead of using numbered versions. This would be difficult if you are publishing both iOS and Android dependencies, but should be very useful for the Android-host KMP workflow.
Code Modules
The code in the sample is essentially the code in our KaMP Kit KMP sample app, but split out into an external “SDK” format. For your own code, you should replace the sample modules and packaging with whatever your project needs. The sample intends to show several libraries and a few basic features fully implemented.
analytics
This is a “typed” analytics library. The idea is that analytics is critical to many apps, but most analytics libraries are just “maps of strings” that marketing people put in a spreadsheet. Implementing and maintaining these values correctly across platforms is critical, but very difficult to verify. There’s also no “joy” for the developers. They never get to see the outcome. It’s just a tedious coding chore that nobody enjoys.
Having an analytics library with typed and named function calls is a method some teams use to improve analytics maintenance.
Because these functions are intended to be called directly from Swift, this whole module is exported to the Xcode framework. See allshared/build.gradle.kts:
listOf(
    iosX64(),
    iosArm64(),
    iosSimulatorArm64()
).forEach {
    it.binaries.framework {
        export(project(":analytics")) // <-- This line
        isStatic = true
    }
}
breeds
This module provides the “data” of the app. It calls the Dog CEO REST API to get a list of dog breeds and images for those breeds. The module uses Ktor for network calls, SQLDelight for local storage, and various other architectural structures to manage everything.
This module is not exported for a few reasons. The majority of the code is not called directly from Swift. The entry points are provided in allshared. Also, SQLDelight generates Kotlin code, which includes references to parts of the SQLDelight library that Swift definitely doesn’t need. There’s no way to make that generated code “internal”, so “hiding” it inside another module is a common approach to API surface hygiene.
allshared
This is the Xcode framework “umbrella” module. There is no Android code here. The build.gradle.kts file configures the Xcode framework structure, and the Kotlin code provides structured SDK initialization specific to iOS.
This is the module that KMMBridge is configured to publish the Xcode dependencies from.
testapps
These are not intended to be “sample apps” for this tutorial. A helpful option separate KMP repos is to have local test apps that you can run and build the KMP code directly with. It is not required to do this, but depending on your setup, you may find them useful. Both apps are configured to build the code locally.
✋ Check your build
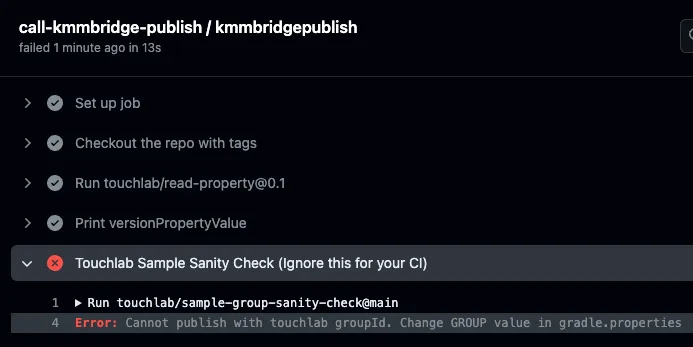
Go back to the GitHub Actions page to check on your build. If done, continue to the next steps. If the build failed, here are some possible causes:
The GROUP value wasn’t changed, or the change wasn’t pushed. The build will fail at “Touchlab Sample Sanity Check”
“Sanity check error” screenshot
The build was run more than once If the release exists, the build will fail.
For other issues, reach out or file an issue in the quick start template repo.
👍 Next Steps
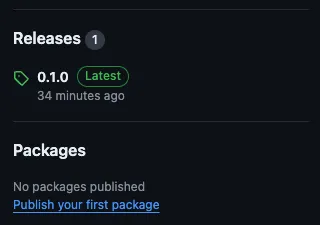
If the build succeeded, you should see a new release on your repo GitHub page.
Xcode Integration
Now that the build is complete you can try integrating it.
Go to touchlab/KMMBridgeSPMQuickStart-iOS and create another repo using that template (or just clone it, if you don’t plan on starting with it).
Open ios.xcodeproj, either directly with Xcode or by open it from a terminal.
To open from the terminal, cd to the directory you just cloned and run:
open ios.xcodeproj
SPM and Xcode
Xcode can understand and use SPM dependencies, but SPM is an independent build system that can be used to build Swift-oriented projects without the GUI Xcode tools. SPM has its own conventions and rules as well as config. The details of SPM config are way beyond this post, for now we’ll go over the basics.
For more details, you can find the SPM documentation on the Swift Website or on the GitHub Repo.
SPM is configured with a file called Package.swift. Unless you’re doing something complex (and you really know what you’re doing), that file needs to live at the root of the git repo from which you are publishing.
SPM uses git to organize libraries and versions. The Package.swift lives at the root of the repo, and git tags mark versions. SPM really does not like version tags that aren’t proper semver. You can use other tags and point Xcode at them directly, but this will cause other manual friction when updating. SPM has other options for tracking builds, including the option of using branches rather than tags. Again, see the Android-host KMP workflow for an example of how you might use this approach.
You can publish your Package.swift to a different repo than your KMP library. This tutorial uses a separate KMP repo to host your KMP code and publish your SPM dependencies, so pushing those dependencies to yet another repo doesn’t make much sense. However, if you are publishing a module from your Android repo, or want to keep your source code private, see Publish SPM to Another GitHub Repo for details.
There are two parts to integrating a KMP SPM library. This is very important. You add the git repo through the Xcode GUI, but you also need to add auth again separately to grab the binary file. This is simply how SPM works with prebuilt binaries.
Public repos on GitHub using GitHub releases to host binaries should be able to bypass auth, but most teams will likely be using private builds.
Xcode GitHub Access
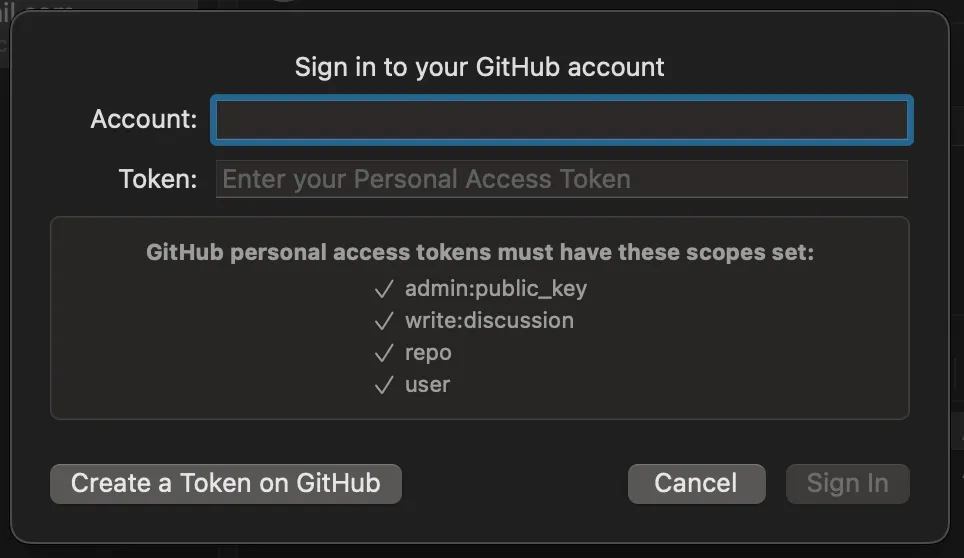
In Xcode, go to “Xcode > Settings”, then the “Accounts” tab. If there is already a GitHub entry, you can probably skip this step. If there is not a GitHub entry, click the ”+” on the bottom/left, and add “GitHub”.
GitHub Xcode screenshot
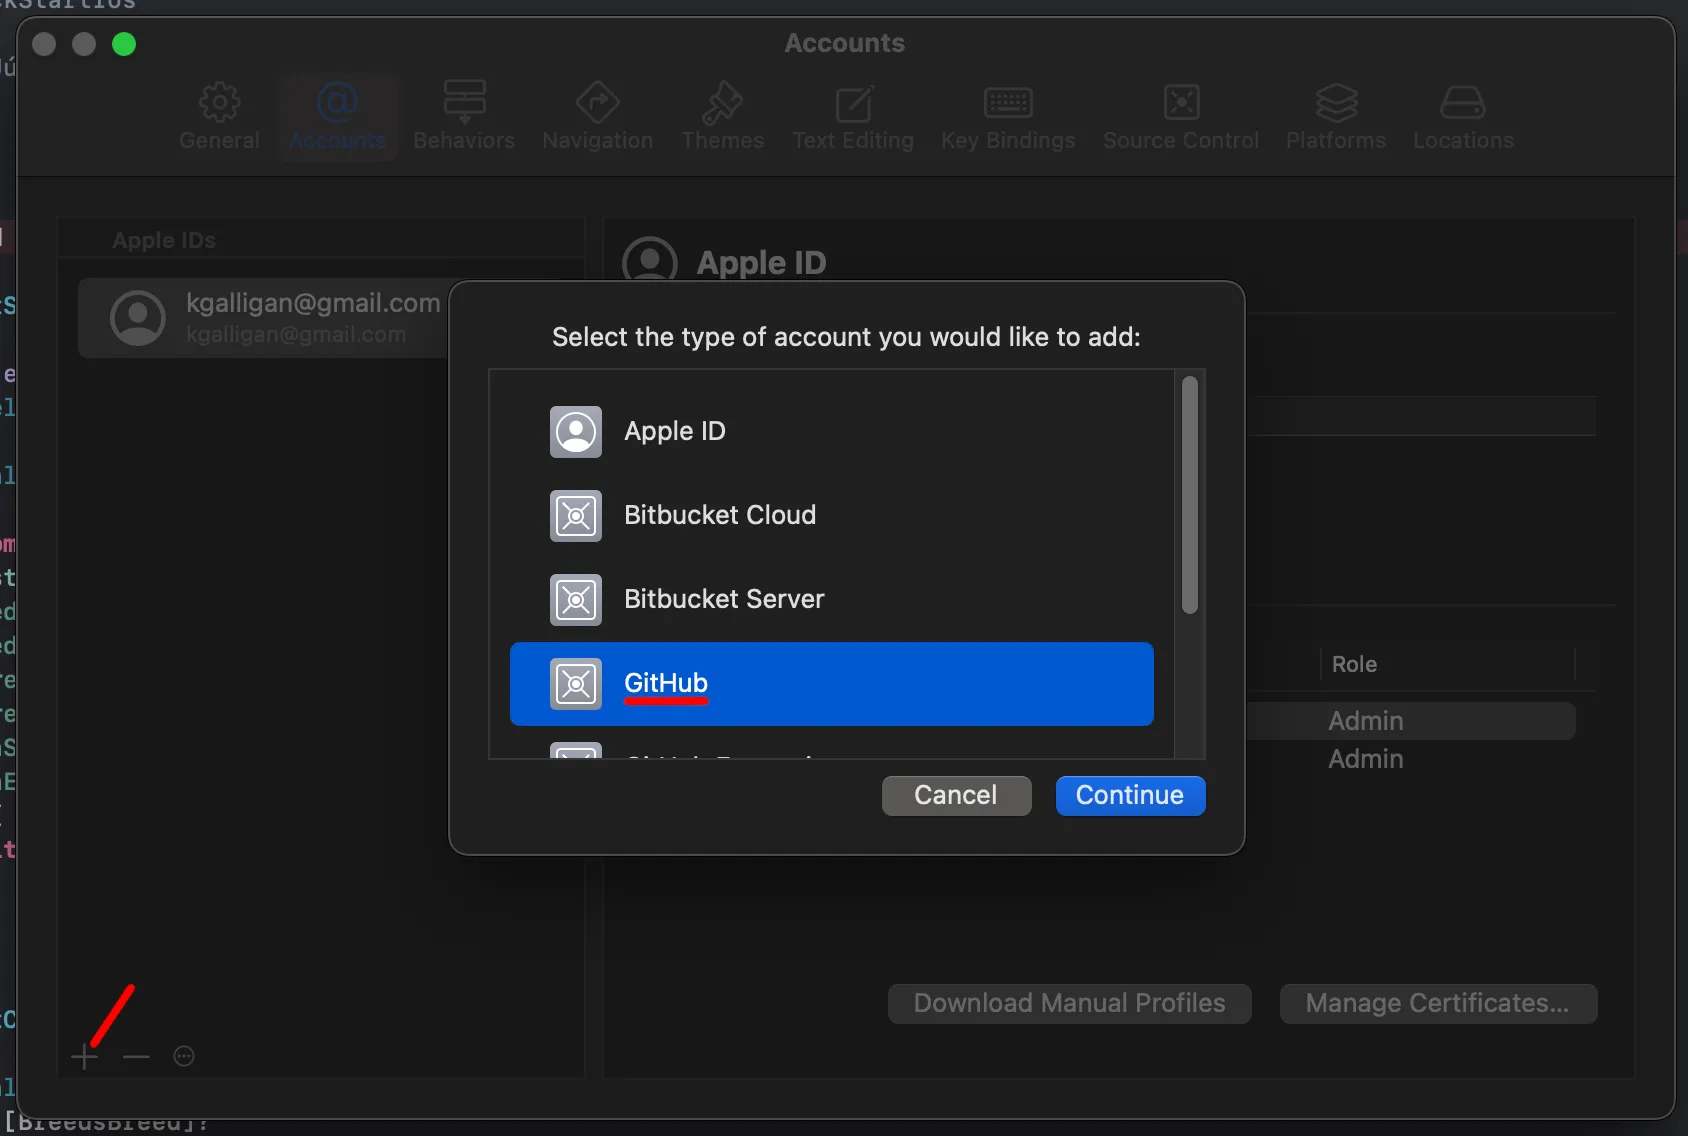
In the dialog, add your GitHub username to the “Account” field, and paste the PAT we created earlier into the “Token” field.
GitHub Xcode Sign in screenshot
Artifact Authentication
GitHub requires you to authenticate to download private repo binary files. Adding this authentication is not complex, but if any of the steps are incorrect, Xcode and SPM aren’t very helpful explaining what went wrong. Make sure you double-check everything.
You can read about this in detail at Xcode and Binary File Authentication. We’ll summarize for this tutorial.
Create or open the file ~/.netrc. This provides “curl” and other tools with authentication information.
touch ~/.netrc
open ~/.netrc
Add the following to the file:
machine api.github.com
  login <Github User>
  password <PAT>
The login is your GitHub username, and the password is the same PAT we created earlier. Save the file and exit.
Adding the library
In Xcode, make sure you have the iOS quick-start sample project open. To add an SPM package, go to File > Add Package Dependencies... in the Xcode menu. You can usually browse for the package at that point, but depending on how many repos you have, it may be easier to copy/paste the repo URL in the top/right search bar.
Xcode Packages screenshot

Paste the repo web URL, without the .git extension of the https URL you would use to clone a repo. Xcode will happily show you the dependency, then fail to add it with a fairly cryptic error.
After finding the package, select it, leave “Dependency Rule” as “Up to Next Major Version” and “Add to Project” as “ios”.
On the next screen, make sure “ios” is selected in the “Add to Target” column:
Xcode Targets screenshot

Assuming you’ve configured your auth correctly, Xcode should download the binary file, and you should be able to access your KMP code!
In Xcode, click the “Run” button, but make sure you have an iPhone simulator selected.

Android Publication
Our build has also published Android dependencies. These can be found in the GitHub Packages section of the KMP repo.
Clone the Android Sample
Open our Android sample repo. You can either use it as a template, or clone it directly.
Add the maven repo
In the Android sample project, open settings.gradle.kts. Find dependencyResolutionManagement at line 9. Change the uri to point to your KMP library repo, making sure to leave https://maven.pkg.github.com/ as the server:
dependencyResolutionManagement {
    val GITHUB_PACKAGES_USERNAME: String by settings
    val GITHUB_PACKAGES_PASSWORD: String by settings

    @Suppress("UnstableApiUsage")
    repositories {
        google()
        mavenCentral()
        maven {
            name = "GitHubPackages"
            url = uri("https://maven.pkg.github.com/touchlab/KMMBridgeSPMQuickStart") // <-- Change this
            credentials {
                username = GITHUB_PACKAGES_USERNAME
                password = GITHUB_PACKAGES_PASSWORD
            }
        }
    }
}
You’ll also need to supply GitHub auth info to access these dependencies, even for public repos. GitHub Packages requires GitHub authentication to access public dependencies.
Each user will need their own credentials. To do that, we reference Gradle properties in the build file. For each user, those values are set in the global Gradle properties file. Open or create ~/.gradle/gradle.properties. Your GitHub username is your actual username. The “password” is the PAT we created earlier:
GITHUB_PACKAGES_USERNAME=[GitHub username]
GITHUB_PACKAGES_PASSWORD=[Your PAT]
Add the new dependencies
Open gradle/libs.versions.toml. Find sharedlib-analytics on line 66. Change sharedlib-analytics and sharedlib-breeds to match the GROUP value from your KMP library.
sharedlib-analytics = { module = "[your GROUP]:analytics-android-debug", version.ref = "sharedlib" }
sharedlib-breeds = { module = "[your GROUP]:breeds-android-debug", version.ref = "sharedlib" }
Find sharedlib = on line 24. This is the version of your KMP library. Right now, that should be whatever you set your build’s LIBRARY_VERSION Gradle property value to.
sharedlib = "0.1.1"
If all is configured correctly, reload Gradle, and run the app!
Publishing to a different repo
You can publish an SPM build from one repo to another repo. In this context, when using a 3rd repo to hold your KMP code, there aren’t many good reasons to do so. The only logical one that I can think of is if you want to make your library public but keep your code private. However, if you are publishing a KMP library from your Android repo, you might want to publish SPM to a different repo to avoid conflicts with git tags and GitHub releases created for use by your Android dev workflow.
See Publish SPM to Another GitHub Repo for instructions on publishing to a different GitHub repo.
See Android-host KMP workflow for details on publishing an SPM modules from an Android repo.
Next Steps
The template is meant as a starting point. Rip out our sample code and add some of your own.
If you use a different CI, or need to publish to other locations, you can still use KMMBridge. It is meant to be easily extended. Be prepared, though, that any production build config can be complex, and Xcode builds are no exception. We’ve also found that the people setting up the KMP builds are usually familiar with Android and Gradle. Less so with Xcode and SPM. We would highly encourage you to recruit help from your iOS team.
- Repo and Dev Workflow Models
- Create a KMP Repo
- Change the GROUP value
- Set your build version
- Publish your first build!
- ⏳ Wait (~15 minutes)…
- Faster CI Builds
- GitHub Access
- Some Highlights (while we’re waiting)
- Build Version
- Code Modules
- Only expose what you need
- ✋ Check your build
- 👍 Next Steps
- Xcode Integration
- SPM and Xcode
- Xcode GitHub Access
- Artifact Authentication
- Adding the library
- Android Publication
- Clone the Android Sample
- Add the maven repo
- Add the new dependencies
- Publishing to a different repo
- Next Steps